

I used very few tools for this, just an exacto knife, a glue gun, a pencil, a small ruler and scissors.

Then I gathered up my supplies: a burlap rose, a photo box, laminated burlap sheets and navy blue ribbon. This is where you can get creative. Pick a different flower or accessory, a different color ribbon, a different color fabric or paper, etc.

Step 1: Draw on the slit that the cards will be inserted in to. I drew mine closer to the front of the box in case cards are longer, they will still slip in easily. Mine is about half in inch wide and is about an inch short than the box (half an inch on each side).
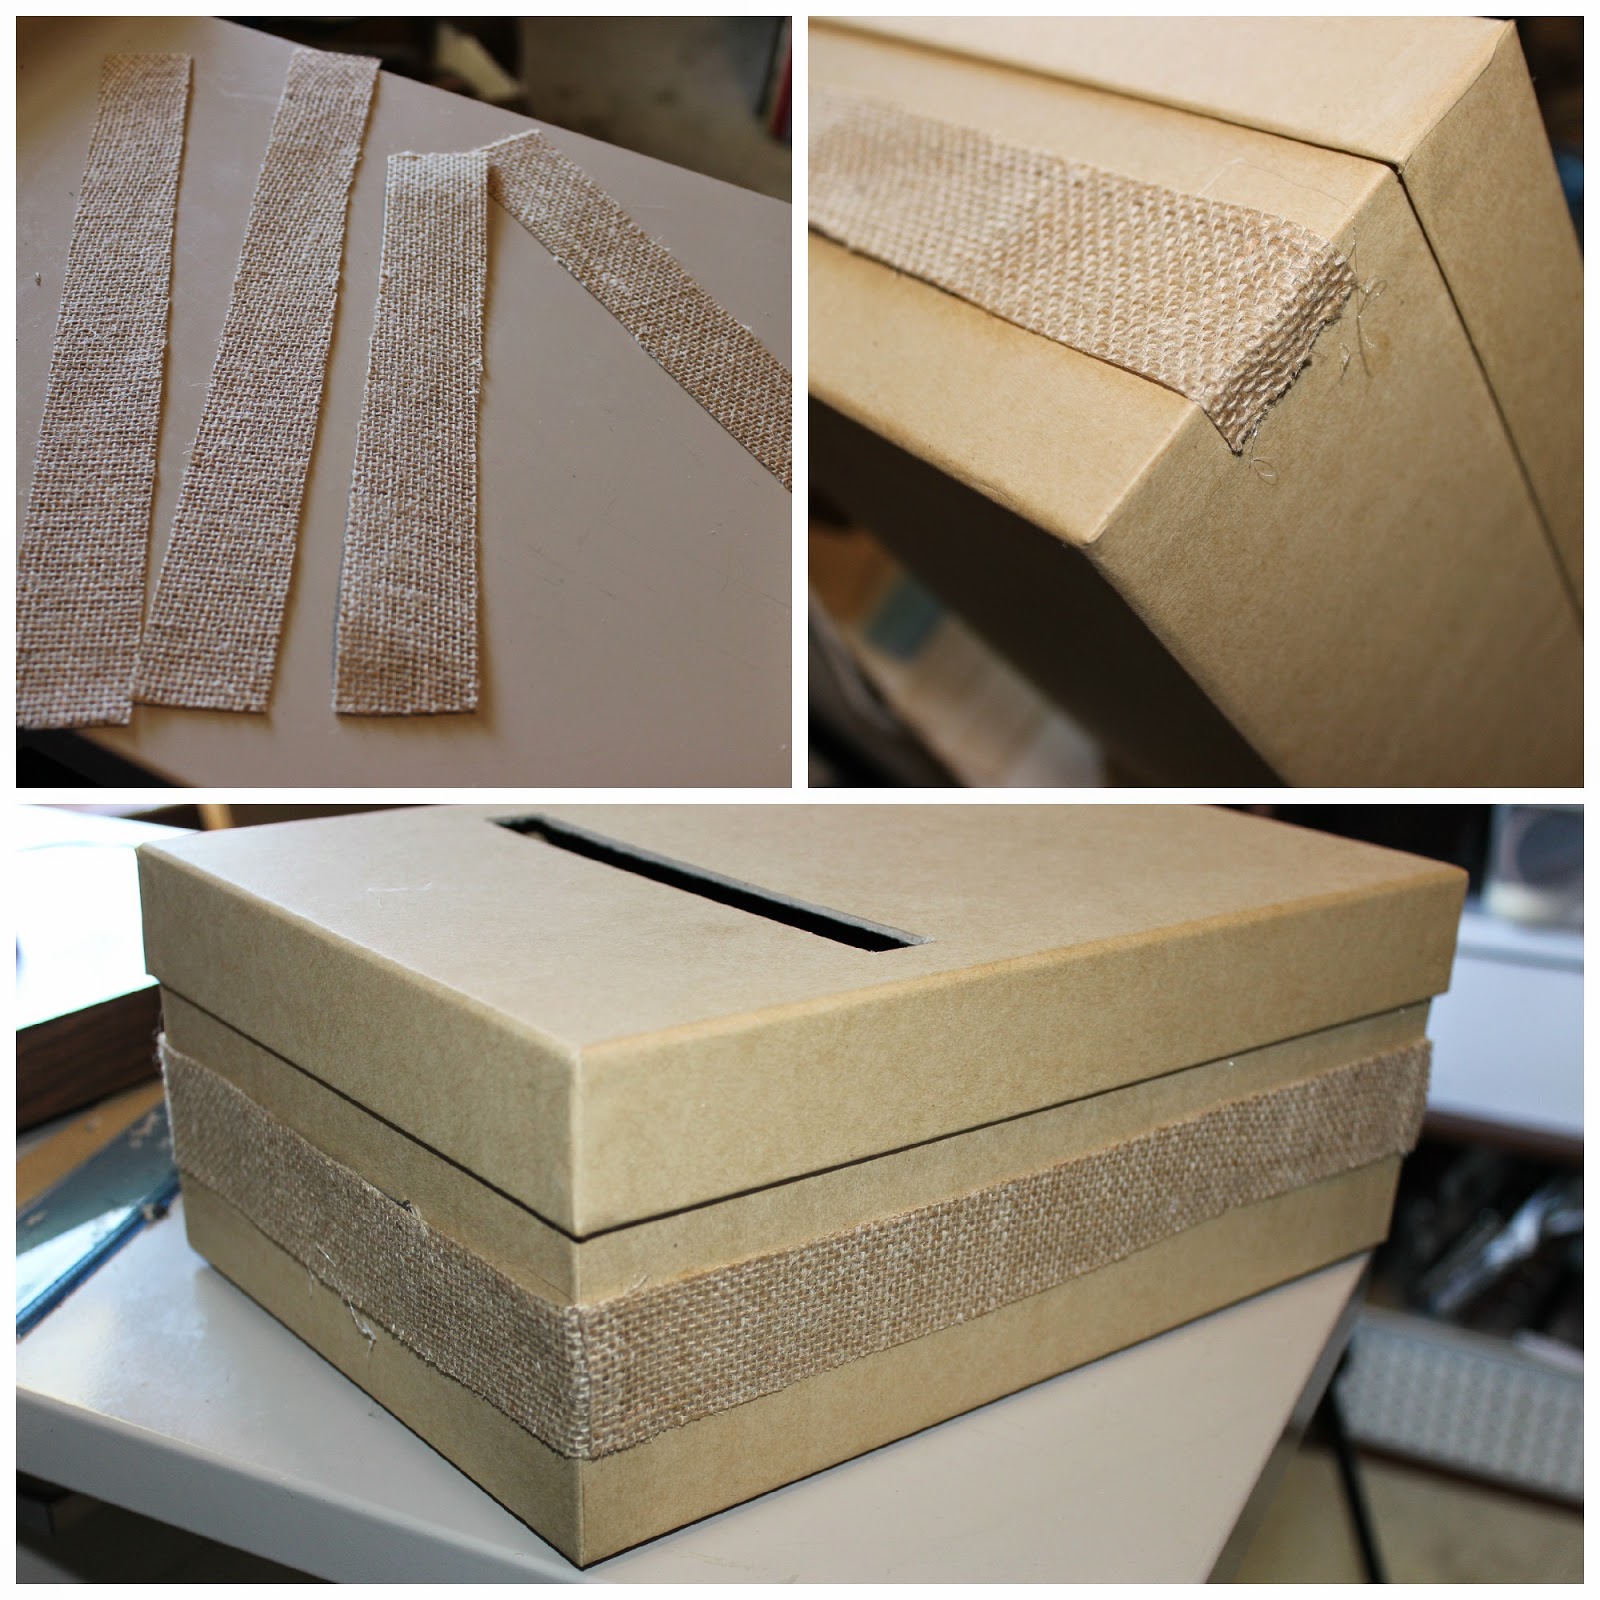
Step 2: I cut the burlap into strips. The shorter strips for the front and back I cut just slightly longer than the box so that the burlap could wrap around the corners and make smoother edges. The ones on sides were exactly long enough to fit the box. I glued the front strip on using the glue gun and covered the metal label holder on the front. I then glued down the two side strips overlapping with the burlap from the front. I didn't glue down the opposite end so that when I attached the back strip of burlap I could wrap it around the box and then glue the side strips over it.

Step 3: Next I glued the ribbon around the box, paying close attention to make sure the corners were glued really well. I did this in one big continuous strip of ribbon instead of four pieces. I started at the front and wrapped all the way around overlapping the beginning piece. I did this on the front because I knew I would be placing the flower over the edges. If you aren't placing anything on top of the edges, you could overlap the ribbon in the back so that it isn't as noticeable.

Step 4: I cut the stem off of the burlap rose, and then hot glued it onto the box where the ribbon ends meet. I made sure to use quite a bit of glue and held the flower on until I knew it was set.

And that is the finished product! What do you think? I was really pleased with the ending result!
No comments:
Post a Comment